🚀 Beginner’s Guide to Bottom Navigation with Android Jetpack
By Wajahat Karim • 12.Jan.2020
A step-by-step guide for beginners on how to create Bottom Navigation using Android Jetpack Navigation
After introduction of Fragments in Android Honeycomb, it became obvious to use more Fragments in preference to Activities to make apps lighter and faster. Google also started recommending single activity architecture. But implementing it has been a real pain-point for developers. The major cause of this is the Fragments and its transactions overhead. Its very hard to learn, debug, and deal with whole mess of IllegalStateException of Fragments.
{{% carbonad %}}
Finally Google heard its developers and introduced Android Jetpack. Its a suite of libraries and tools to help developers in making high-quality scalable apps easier and faster. It provides solutions to lots of problems such as architecture guidelines, background tasks scheduling, and of course the Navigation.
](https://ik.imagekit.io/z23yf8euyq/0_Zc0mOFvJyecHTG1w.png)
👌 Jetpack Navigation
Jetpack Navigation, or Android navigation component, is a part of Android Jetpack components and provides developers tools to create single activity apps with a visual drag-drop representation and easy interface. It manages the whole Fragment transactions overhead itself and gives a simple API to deal with the navigation in intuitive and readable way.
](https://ik.imagekit.io/z23yf8euyq/0_0TpxYrC_7KVrkZw6.png)
Using Jetpack Navigation, you can separate navigation flow from the other parts of code like business logic, database operations etc. This way navigation flow can be easily modified without having to make many changes in the code. It also eliminates the need to write boilerplate code to link fragments or activities in applications.
In this tutorial, we will discuss on how we can create Bottom Navigation using the awesome Jetpack Navigation component and see how easy and fun it is to work with it.
🎯 The Demo App & Code
We will create a simple app using Material Component’s BottomNavigationView and Jetpack Navigation component to switch between screens or technically Fragments . Here’s the demo GIF of the app:
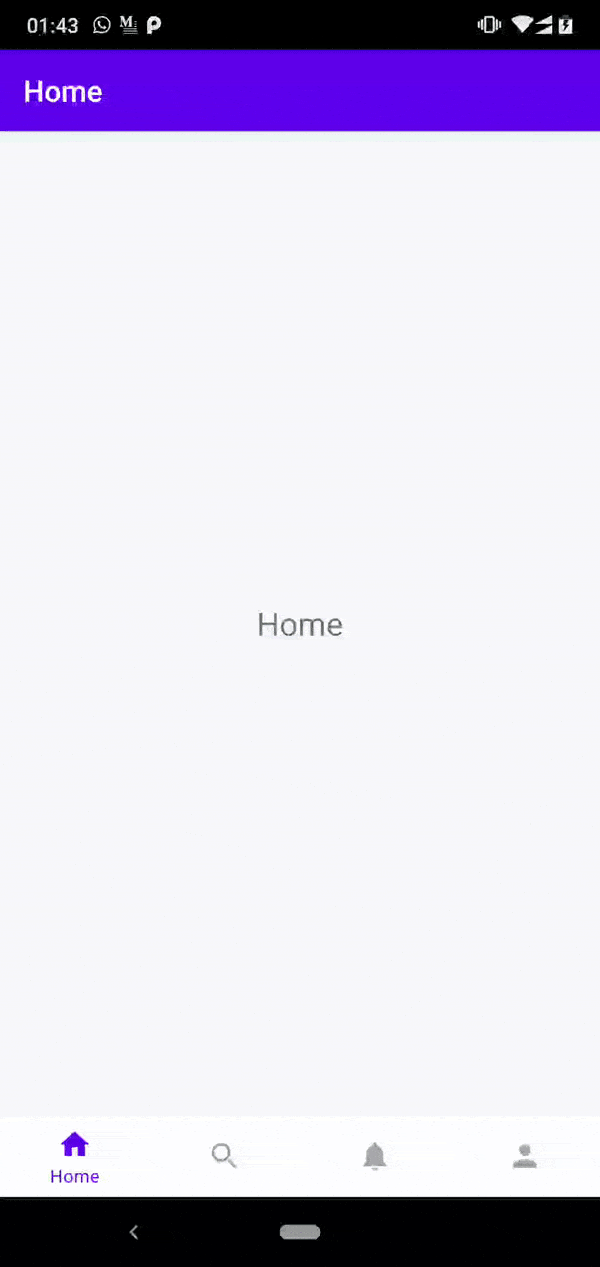
This demo covers the following 5 use-cases of the Bottom Navigation.
🚀 Simple Bottom Navigation with Jetpack Navigation
🎨 Adjusting AppBar/Toolbar for Top Level Destinations
☑️ Adding Menu Options in Some Screens
🗒 Creating Detail Screens for Some Screens
🛑 Quitting app on Double Back-Press Tap
This article covers the first two use-cases and others are covered in the second part of the article. It will be published soon.
The code of this app is available on my Github profile at following repository.
{{% linkpreview title="wajahatkarim3/BottomNavArchDemo" subtitle="The demo project for Bottom Navigation with Navigation Architecture Components article - wajahatkarim3/BottomNavArchDemo" link="https://github.com/wajahatkarim3/BottomNavArchDemo" thumbnail="https://avatars0.githubusercontent.com/u/8867121?s=400&v=4" %}}
💻 Let’s Get Started
To make things easier, I have created a separate branch of the app as the starting point of the application. This branch contains basic structure of app with Bottom Navigation, colors resources, and empty Fragment classes with their layout files already. Go ahead, and clone the start-here branch from this link: https://github.com/wajahatkarim3/BottomNavArchDemo/tree/start-here
{{% linkpreview title="wajahatkarim3/BottomNavArchDemo start-here branch" subtitle="The demo project for Bottom Navigation with Navigation Architecture Components article - wajahatkarim3/BottomNavArchDemo" link="https://github.com/wajahatkarim3/BottomNavArchDemo/tree/start-here" thumbnail="https://avatars0.githubusercontent.com/u/8867121?s=400&v=4" %}}
Here’s a quick explanation of the code:
**MainActivity.kt**: The main launcher
Activityclass. This will be the only single Activity of the application. This contains theBottomNavigationViewand aFrameLayoutas a placeholder for other screens of the app.The empty fragments, *HomeFragment*, SearchFragment, NotificationsFragment, NotificationDetailsFragment, and ProfileFragment: All these classes are just simple empty Fragment showing a simple centered text message with the title of the fragment.
menu/bottom_navigation_menu.xml: This file contains the menu items of the bottom navigation: Home, Search, Notification, and Profile with their menu item IDs, titles, and icons.
🔧 Including Jetpack Navigation in Your Apps
Let’s start by including the Jetpack Navigation library in your apps by adding these lines in app’s build.gradle file:
{{< gist wajahatkarim3 1f3e84736a97144879c88a5ec0f41a65 >}}
We will use the Material Components BottomNavigationView for our bottom navigation. So, you need to add that too in case you haven’t already. You can use other bottom navigation views such as of the Android X or some third party library etc. It will work in same way as this tutorial do. Check the Material Components documentation for more details on this.
🚀 Simple Bottom Navigation with Jetpack Navigation
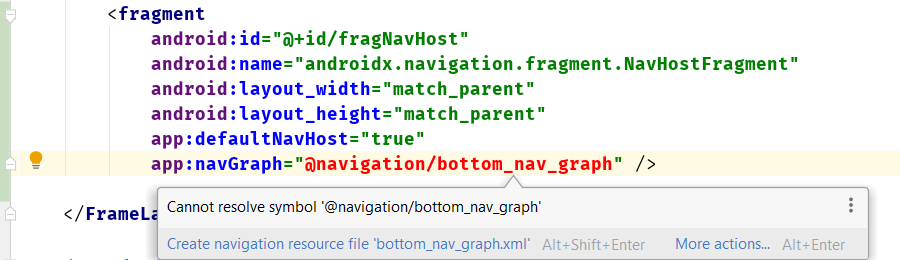
We start by creating a simple bottom navigation flow first. For that, you need to do first add NavHostFragment in your single activity layout file. Add this in the activity_main.xml file inside the FrameLayout tag.
{{< gist wajahatkarim3 8c5e3de5b024590d33b6f01a96c18130 >}}
You will see an error saying “Cannot resolve symbol @navigation/bottom_nav_graph .”
The NavHostFragment as described by the android:name attribute in the above code behaves as place holder for all the other fragments (also known as destinations ) of the app.
With Jetpack Navigation, all the destinations are defined in the XML, which includes the definition for linking of destinations. And you have to trigger these screens in responses to events on a UI widget of any screen from the code. These triggers are called as navigation actions.
The XML which contains navigation info is created in navigation resource folder. To define destinations, you can directly add corresponding elements to it in XML code or it can be created using the navigation editor which can be accessed by opening this navigation XML file.
Now, create **res/naviation/bottom_nav_graph.xml** file. After opening the file, you will see something like this:
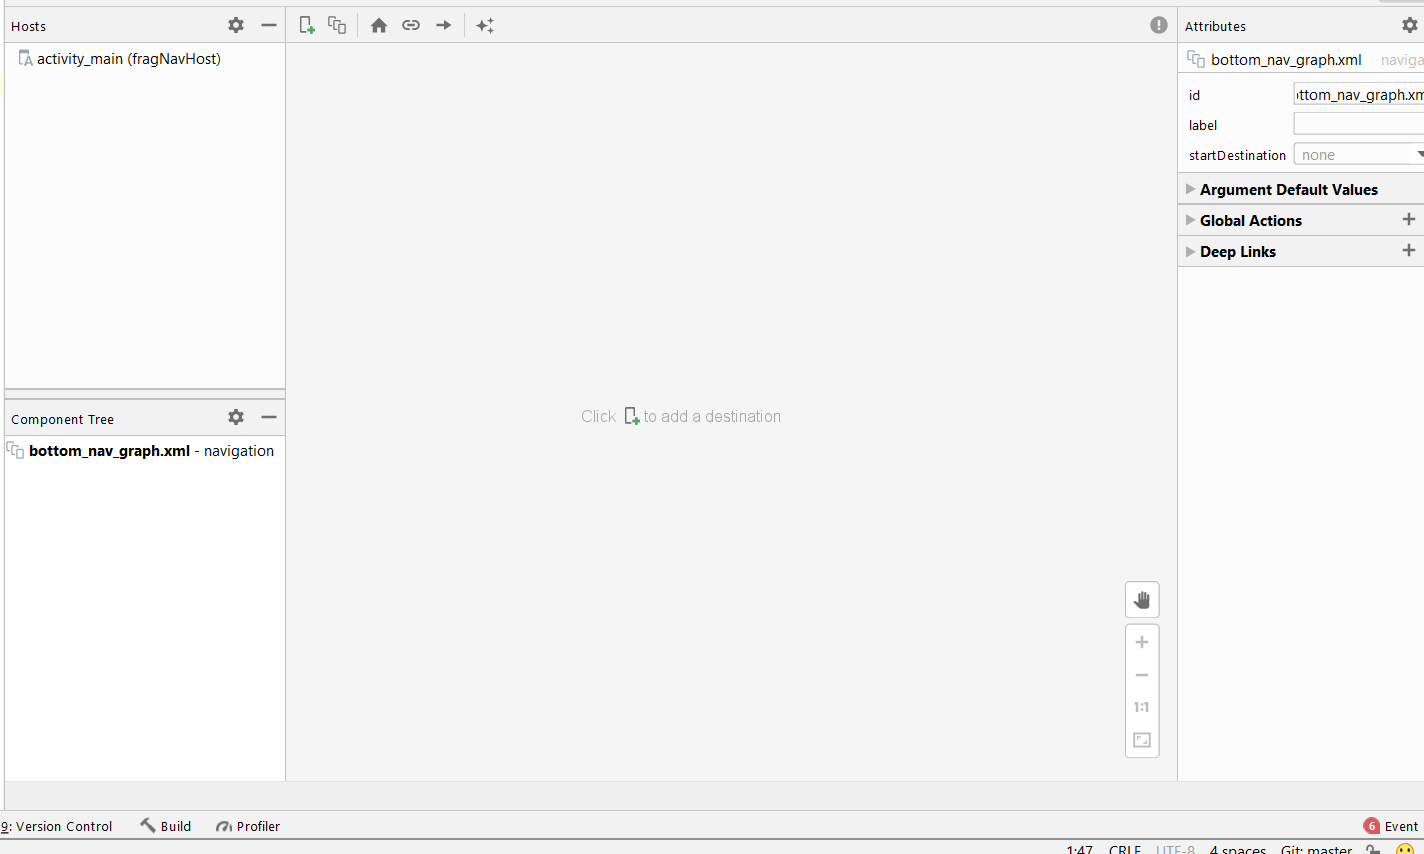
We don’t have any screens or destinations added yet. The code of this file will be this:
{{< gist wajahatkarim3 2a6e95e6846cfc49f60d754477c10372 >}}
Now, add your first destination “Home” by clicking on the Plus (+) button as shown in the image below and select the fragment_home from the list.
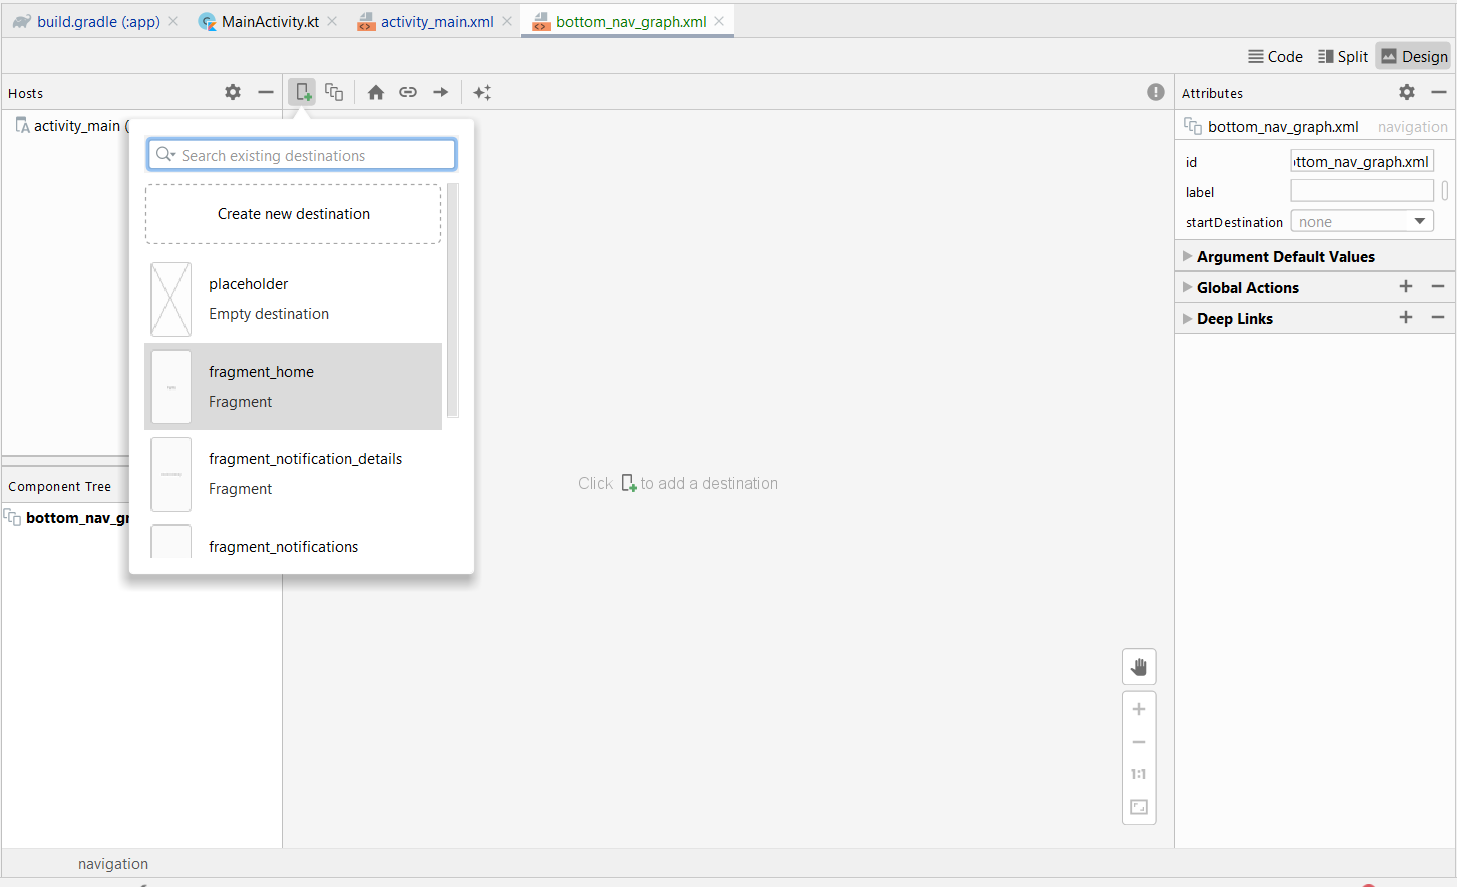
Repeat this process for the Search, Notifications, and Profilefragments as well, and these all fragments will look like screens like the image below.
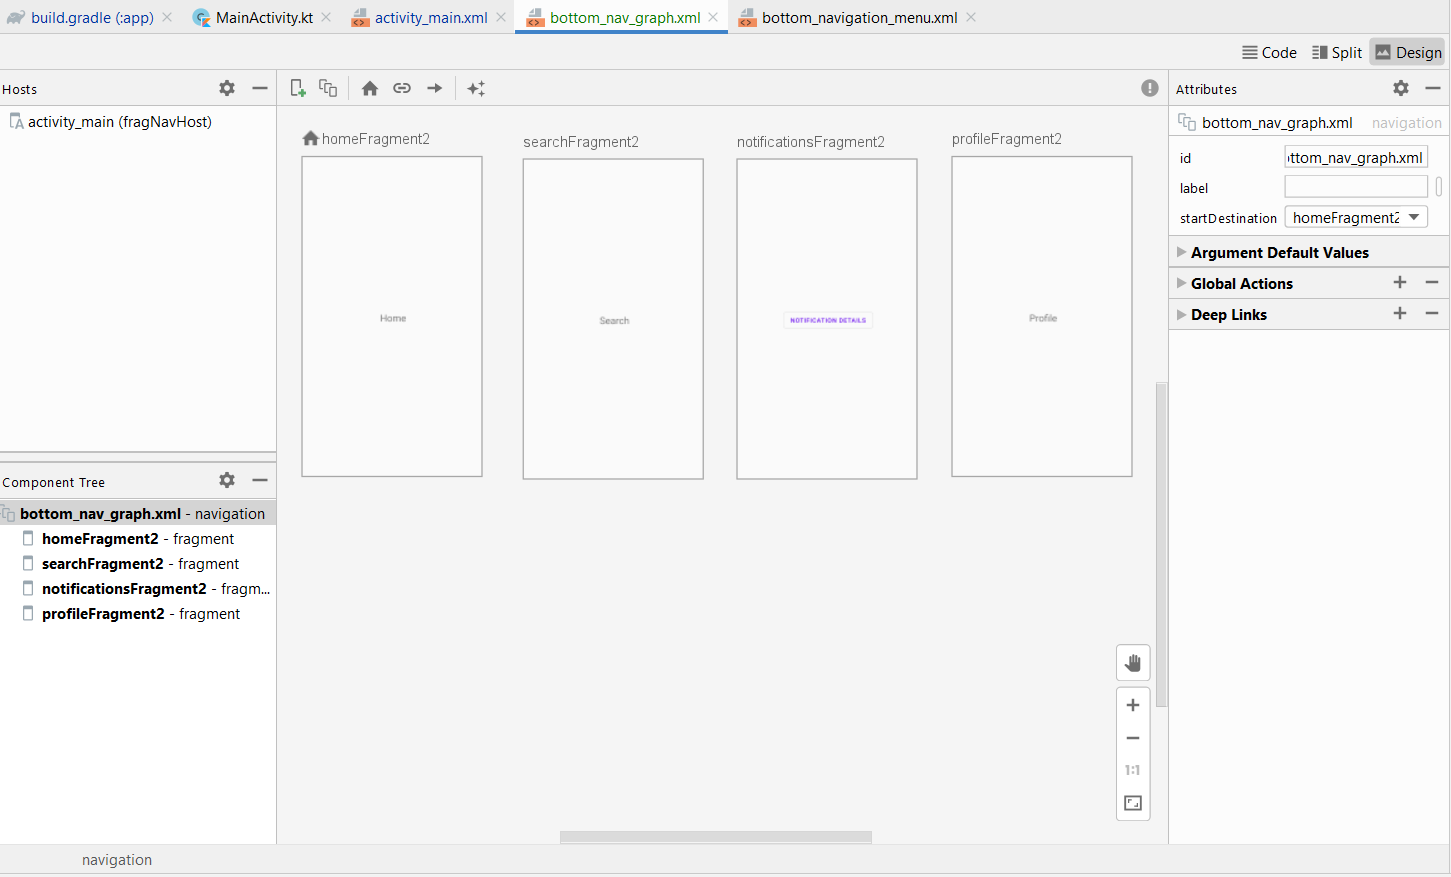
You can drag these screens around to arrange on your convenience. The Home icon before the Home screen’s ID homeFragment2 indicates that this the starting destination of the whole app. This means that when you run the app, you will automatically see “Home” screen first.
Here’s the code in this file:
{{< gist wajahatkarim3 05a52fa403e15e0ef0365f74f7fc68ba >}}
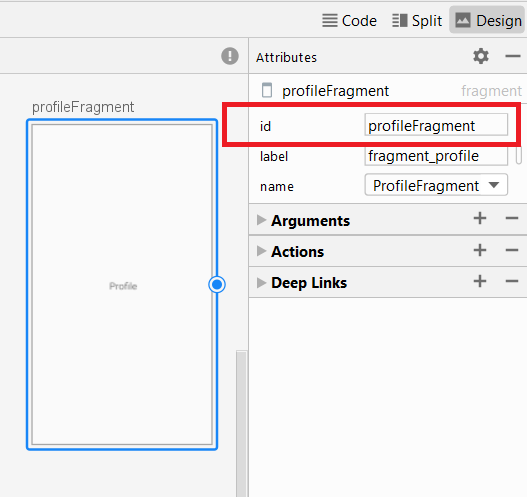
You might be wondering why the IDs of these destinations have “2” term. For example, homeFragment2 instead of homeFragment. This is because the original IDs are already declared in the menu/bottom_navigation_menu.xml file. As discussed earlier, this file provides the menu options to bottom navigation view, their icons, and titles etc.
If you want to connect BottomNavigationView and navigation destinations, then you need to declare same IDs in both menu and navigation files. So, just remove the “2” suffix from all IDs of navigation file and the final IDs of all destinations will be homeFragment, searchFragment, navigationsFragment, and profileFragment. You can change these IDs either directly from the XML code or through the Attributes panel on the right side in navigation design view.
Its time for add some code in our activity class. Open MainActivity.kt file, and create a method setupViews() in it. Call this in onCreate() of the activity. Add these lines in the setupVeiws() method.
{{< gist wajahatkarim3 2b00cc57798507eb3117baf4e255450a >}}
At the lines 3-4, we are calling the method findNavController and passing the ID of our NavHost fragment from the activity_main.xml layout file. This will give us the Navigation Controller. With this controller, we can trigger the screens and control the navigation from the code.
At lines 6-7, we are connecting the navigation controller object (navController) with our bottomNavigationView . This is it.
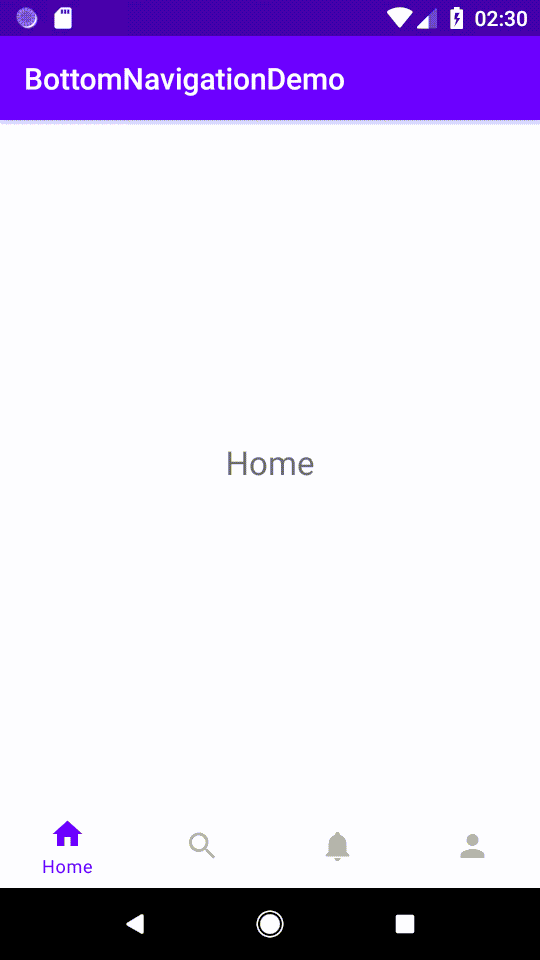
Remember, you have to keep the same IDs of the destinations in the navigation graph file and menu items in the menu of BottomNavigationView file. And now run the application and you will see all sections of bottom navigation will work and show the respective fragments. Here’s the GIF of the running app.
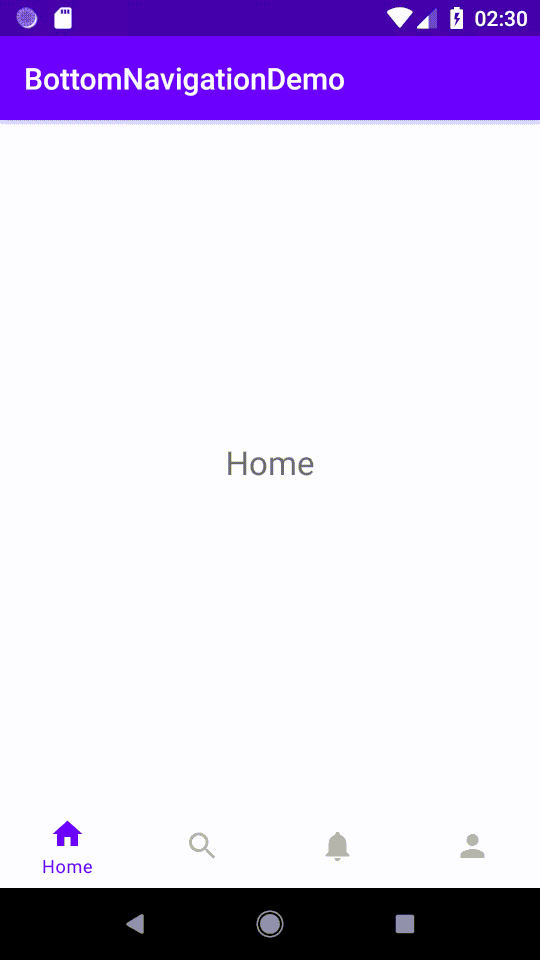
As show in the demo GIF above, all sections are showing their respective screens. And pressing back moves back to Home screen, and then pressing back again exits the application.
🎨 Adjusting AppBar/Toolbar for Top Level Destinations
But there’s one issue. The Toolbar/Appbar label is not changing at all. You can do it very easily by calling the method setupActionBarWithNavController() in the setupViews() method like the code below.
{{< gist wajahatkarim3 aa39f1ac8a41d1b7840ec096ffe063f7 >}}
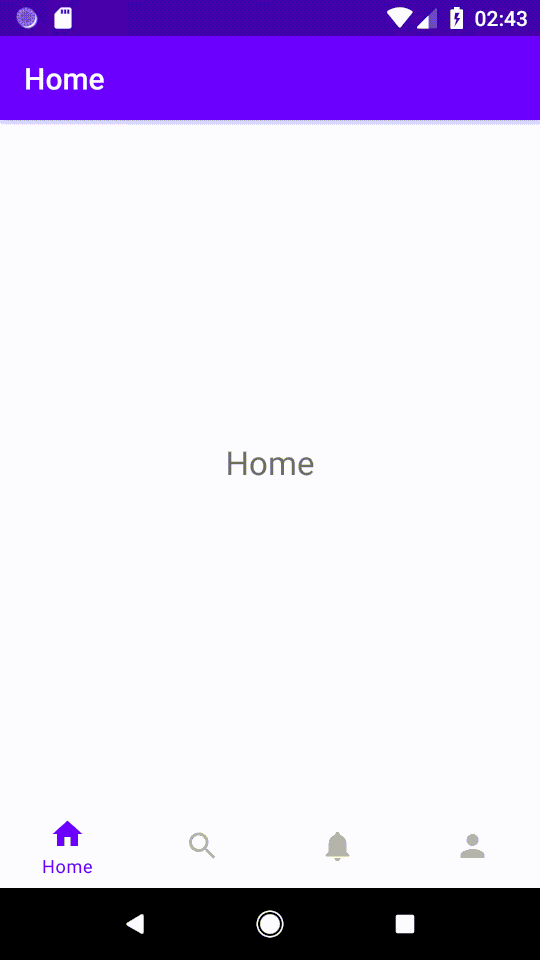
Now, run the application. You will see the label of each screen such as fragment_home, or fragment_search etc. in the ActionBar. You can change these labels in your Navigation file either through XML code with android:label or directly from the Attributes panel as in the image below.
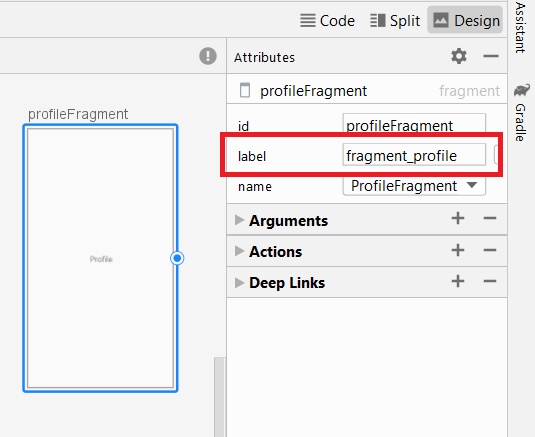
Set these to Home, Search, Notifications, and Profile for all your destinations. And your app will look the GIF below.
You can see that your ActionBar is applying the right label. But there’s a back arrow in the other 3 sections except Home. This is behaving like Home is the parent section and others are the children sections.
You can easily fix this by using the AppBarConfiguration class. You need to declare the top-level destinations in its constructor and pass this in setupActionBarWithNavController() method. Here’s the modified setupViews() method.
{{< gist wajahatkarim3 dc3e1acc1965d0a3d5f91d7c41fee3a8 >}}
You can see that we have passed main 4 sections’ IDs in the topLevelDestinationIds paremter. Now, run the app and you won’t see any back arrow on any main section. Here’s the final demo GIF.
🎯 Conclusion & What’s Next
We learned on how to create a simple top-level sections navigation of BottomNavigationView with Jetpack Navigation component in Android. We also saw how we can customize the Toolbar behavior with Jetpack Navigation. The code of this basic demo is available on the “basic-bottom-nav-toolbar” branch of the BottomNavArchDemo repository here.
In the next article, we will discuss about the following use-cases in Bottom Navigation with Jetpack Navigation component.
☑️ Adding Menu Options in Some Screens
🗒 Creating Detail Screens for Some Screens
🛑 Quitting app on Double Back-Press Tap
Subscribe to my newsletter DroidUp to learn learn about the latest things, tips, and skills in Android development manually handcrafted and curated by Wajahat Karim.